Update 17-Aug-2023: This post has been updated with new information about the Cloudflare Pages V2 Build System which impacts content in the Your First Deployment Might Fail section. Click here to go to the section for more information.
Overview
I have been using Cloudflare Pages to host this Hugo site for the past two months. Overall, it has been an exciting and educational experience. Cloudflare Pages is a solid, stable and reliable platform to build deploy the Hugo site onto. However, there were some things I wish I had known when I started.
This post will not be a tutorial on how to get started with Cloudflare or Pages. I consider it rather a companion piece to the Cloudflare’s own Hugo/Pages tutorial. Cloudflare’s tutorial gives a good foundation for those unsure where to begin, explaining the steps involved in setting up both Hugo and Cloudflare Pages. However, as with many Cloudflare tutorials, it (frustratingly) only gives half of the story.
After setting up a Cloudflare Account (free), installing Hugo on your computer (free) and linking the two through GitLab/GitHub (free) then come back to this post where I explore:
- Setting the correct environmental variables
- The trouble with automated deployments
- Why hardcoding your BaseURL might be a bad idea
This post aims to help you fine-tune your Cloudflare/Hugo settings based on my own experience developing this website.
Update 17 Aug 2023: Cloudflare Pages V2 Build System
Update: Cloudflare Pages has now released its V2 Build System which has a default Hugo version of 0.111.3 (released March 2023), and Go 1.20.5. While your first deployment won’t now fail for the same reason as mine, knowing how to set Environmental Variables is still an thing to know.
Cloudflare Pages projects should default to this new version of the Pages Build System. To find out more information and how to upgrade your existing project to the new v2 Build System click here.
Keep in mind if you are using multiple branch deployments in the preview environment, you will need update that Build System too.
Your First Deployment Might Fail (Affected by Update Above)
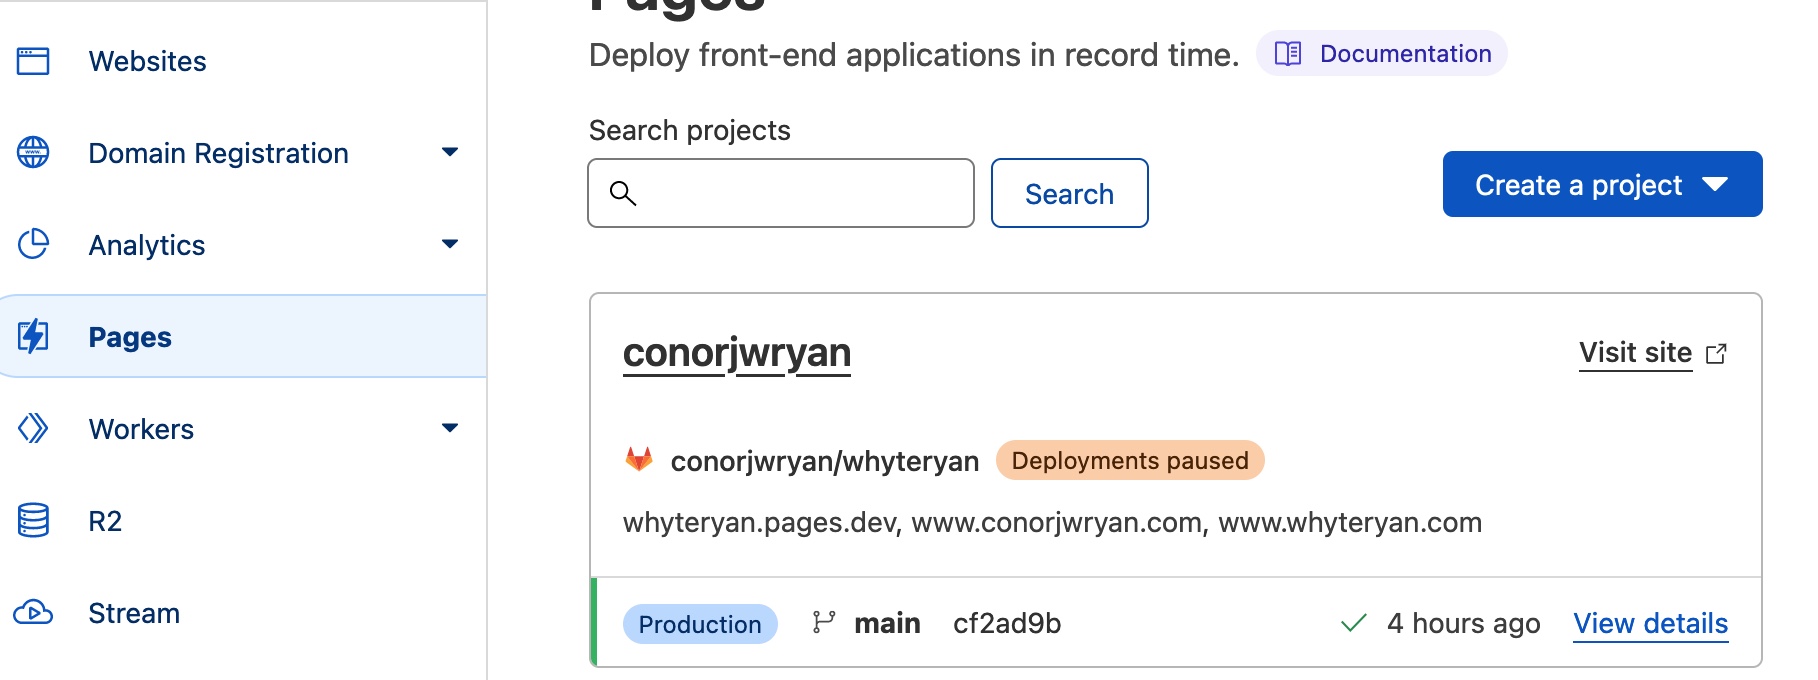
Cloudflare Pages works through integration with Github or GitLab, where each commit to your repository creates an automatic build of your code on the the Cloudflare Pages server. This is called a deployment.
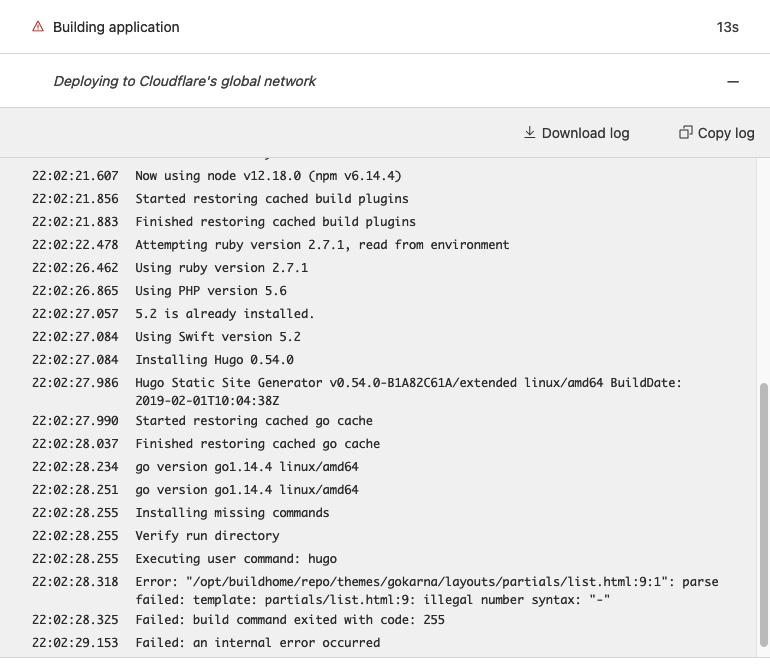
When I first deployed my website to the repository I expected everything to go well. It didn’t… I got Failed: build command exit with code: 255. From the above error in the log, I thought it was something wrong with the theme I had chosen. That was not the case.
Between a look on the Hugo Community Forum and Cloudflare’s own documentation I realised that my site code was not wrong, but rather Cloudflare Pages was trying to run/build the site on an old version of Hugo v0.54.0 (released Feb 2019) compared to something more recent like v0.101.0 (released June 2022).
Admittedly Cloudflare Pages even references this issue in its ‘Known Issues’ post. However, this is only found through extra research.
Understandably, keeping on top of new versions as a platform would be untenable. Hugo has an amazingly active development cycle with dedicated developers and an equally engaged community. This results in new versions every couple of weeks. Equally however, updating that default version once a year would not go a miss, especially 3 years since the 0.54.0 version release, Hugo’s code base has expanded exponentially.
Environmental Variables To Set
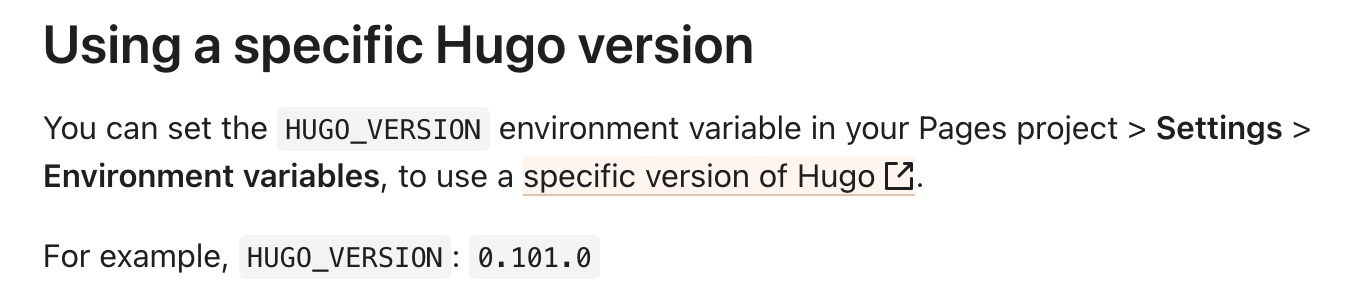
To make your deployment successful a few Environmental Variables need to be set. The HUGO_VERSION and the GO_VERSION (the programming language behind Hugo). This can be done ny doing the following:
-
Go to your Cloudflare Pages Project settings:
 1. cloudflare pages -> your project -> settings)
 -
Go to the
Environmental variablestab and UnderProductionpressAdd Variables(orEdit Variablesif some are already defined)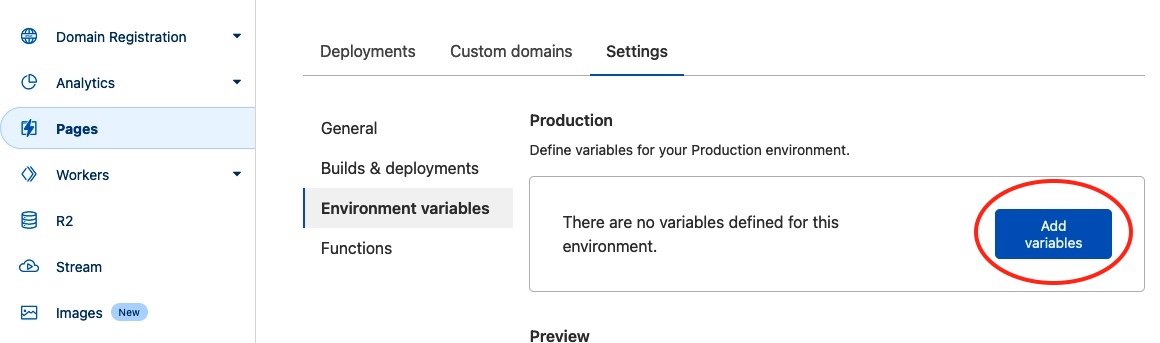
-
Add the following values and press “Save”
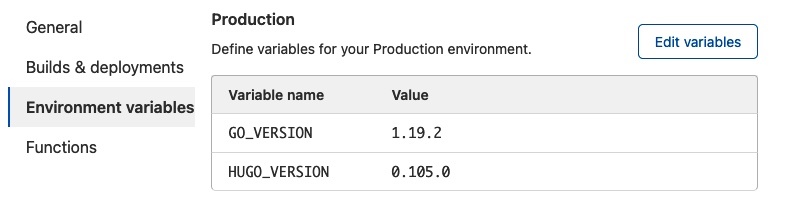 set the 'hugo_version: 0.105.0' and 'go_version: 1.19.2'
 -
With the new variables enabled go back to the project deployment failure screen and press
Retry Deploymentand you should now get a successful deployment.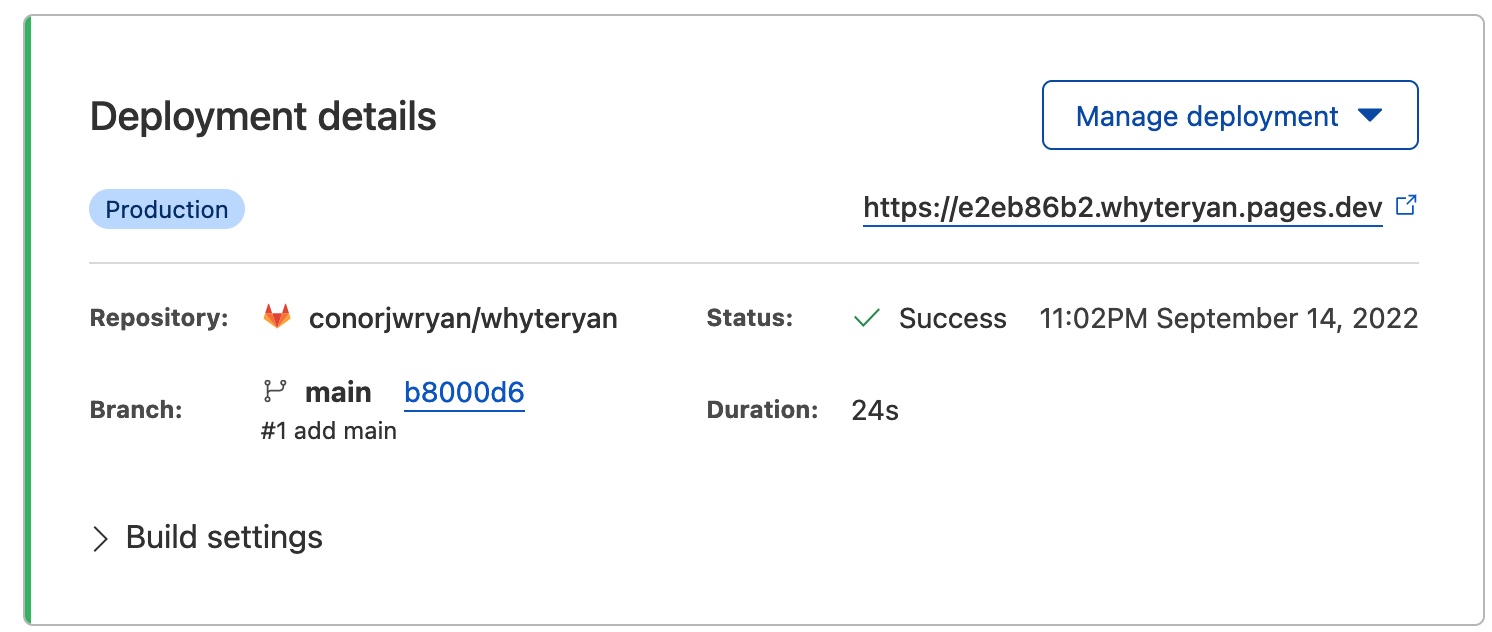 a successful deployment
Notes on Environmental Variables
-
When choosing a new theme always look out for the stated
minimum supported version. With some deployment errors your error log might explicitly tell your Hugo installation does not meet the minimum requirements for your theme. But, it is good practice, especially when starting a project, to have the latest version.To find the latest version of Hugo click here.
To find the latest Go version (Hugo’s programming language) click here.
-
New Hugo/Go versions come out weekly but you don’t need to update your variables as frequently. It’s always good practice to review the Hugo release notes to see whats changed because there could be performance/build time improvements.
-
If you’re using more than 1 branch (like a production and other development branches) then you’ll have to specify
environmental variablesforPreview environmentas well. Preview branch variables are located just under where you enteredProductionvariables. You’ll have to define theHugo VersionandGo Versionagain. -
If you still get a
deployment failednotice, make sure you have specifically chosen ‘Hugo’ in your build settings as this Cloudflare tutorial states. Alternatively search the specific error and you’ll find the answer in the Cloudflare or Hugo support forums.
Do You Need Automatic Deployments Turned On?
For each commit of your code, Cloudflare Pages compiles (builds) your website from scratch based on the code in your GitHub/GitLab repository. This is called a deployment. This build/deployment happens automatically. The question is, do you want it to?
500 Deployments a Month Is Loads

You might be like me; a hobbyist, a one-person team working on a project to show off your talents or to learn new skills. You might even be part of a team of 5 or 10. Whatever your situation, Cloudflare is great for a team of any size. Cloudflare works on a freemium pricing model which means you get an practical amount of services for free but have to pay the more you use them.
If you are on the free tier there are certain limits you need to be aware of. A limit is placed on the amount of builds/deployments you can do a month. Currently on the free tier you are limited to 500 builds a month. If you’re on Professional or Enterprise this limit is increased
Context Matters
Now 500 builds/deployments might seem like more than enough until you realise that this limit is across all of your projects on your Cloudflare Account not just one. For this site alone, in the past month Cloudflare has created 150 deployments in this project. You can see how they add up. The deployment number will only increase the more people are involved with a project.
When working on your code you might want to deploy it. This is because each deployment generates a unique URL which people on a team can see. This can be helpful for collaboration or even seeing changes overtime The point of this isn’t to disable deployments all together, but just automatic deployments giving you greater control.

Personally, I like to commit my code to the repository “just in case” because “I’m paranoid something might happen”. However, each successful commit and deployment gets put on the website for all visitors to see.
I’ve had instances where automatic deployments have resulted in unfinished articles or code has been published before it’s ready. Breaking the site, making it unreachable. I’ve also had deployments “wasted” editing README or CHANGELOG files. I want more control on what my visitors see so I’ve decided to turn Automatic Deployments off
How To Turn Off Automatic Deployments
-
Navigate to the settings page of your project, click “Builds & deployments” on the left-hand side and press “Configure Production deployments”
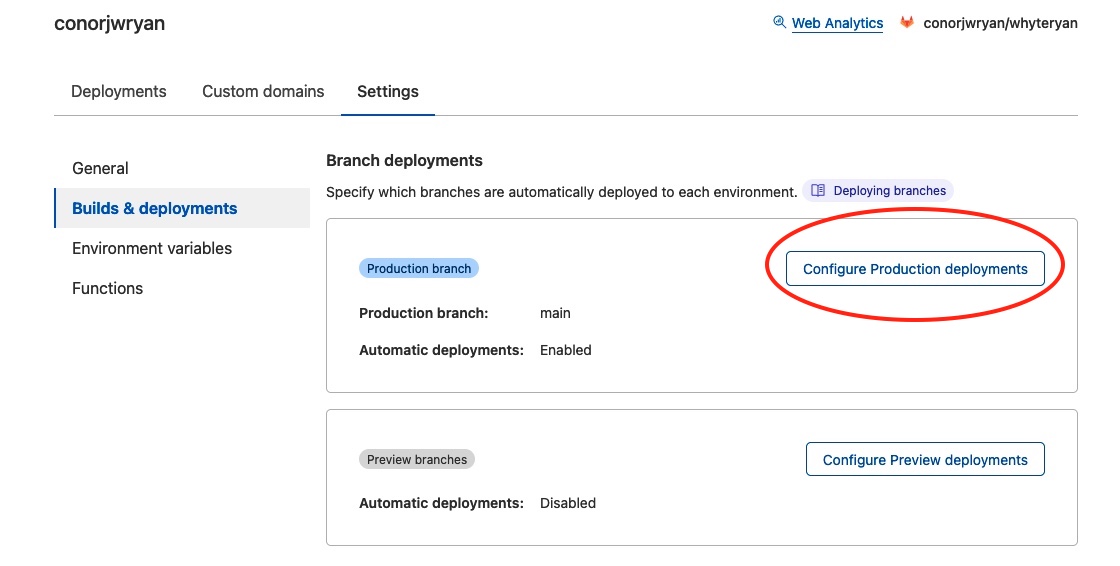 1. cloudflare pages -> your project -> settings -> builds & deployments -> configure production deployments
 -
Under “Configure Production deployments” uncheck the tick box next to “Enable automatic production branch deployments” and press “Save”.
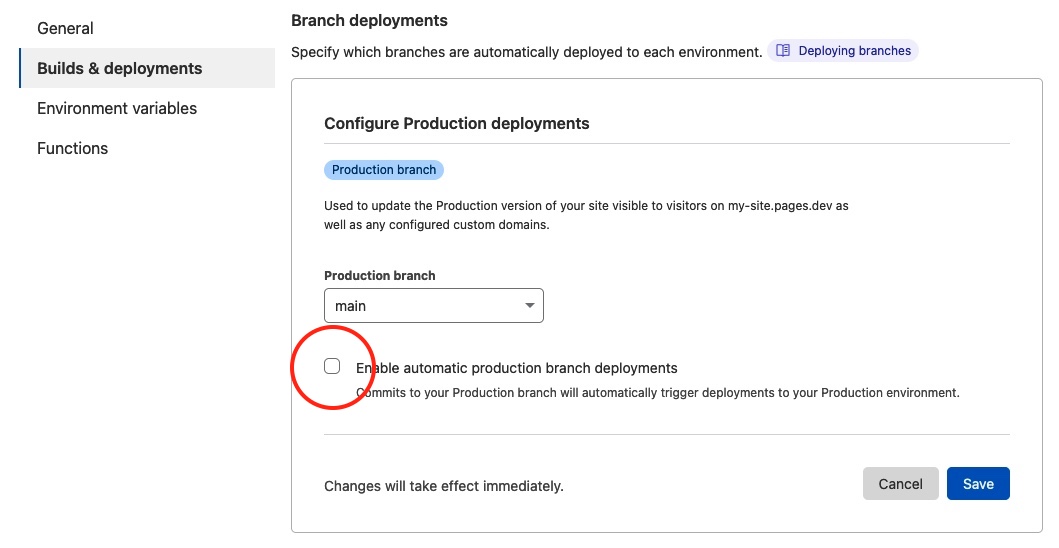 2. uncheck the box 'ensure automatic production branch deployments'
 -
Commit your code as normal. Deployments listed on the main should show “Skipped” as their status. When you are ready to update your site click the “…” on the right of the skipped deployment and press “Retry Deployment”.
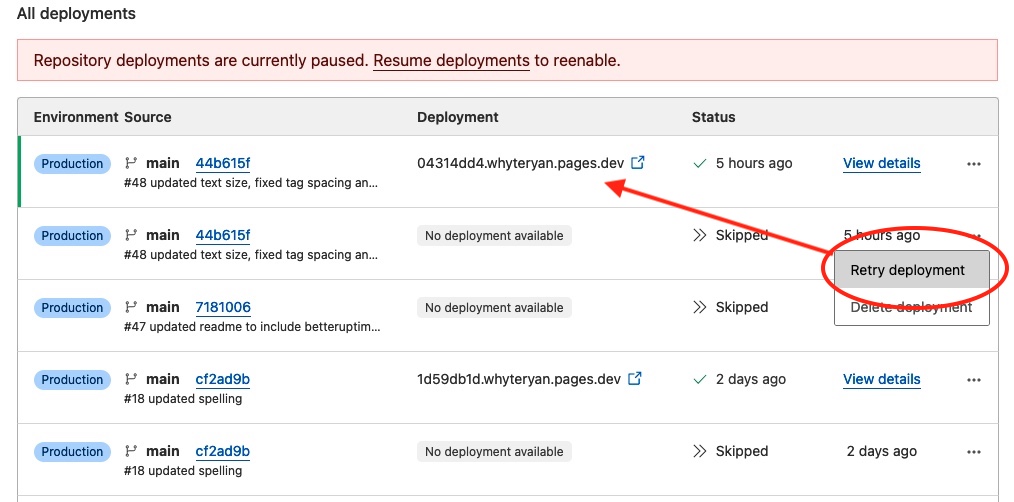 3. when ready click '...' and then 'retry deployment' on the right-hand side
A successful deployment will generate a unique URL and also be accessible at your domain.
What Is Your baseURL?
Each deployment on Cloudflare Pages creates a unique URL like abf4676b567d.your-project.pages.dev which takes you to a fully self-contained copy of your website up to the point of the stated git commit. This is great for test new features in a fully rendered environment allowing you to collaborate with people. Having this unique URL is also a good point of reference allowing you to view your website at a specific point in the past.
The Problem With A Defined Host URL
I deployed my site, committed new code, countless times before I needed to go back and check how my site was before. My public URL being: https://www.conorjwryan.com
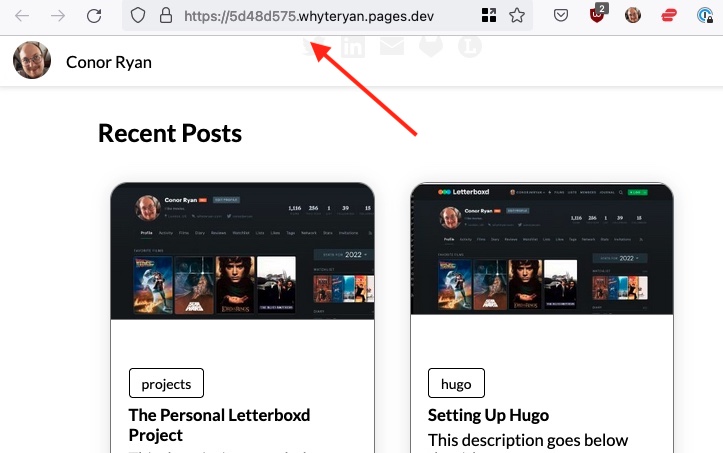
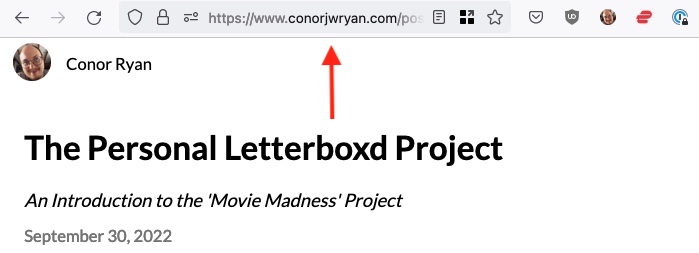
Clicking the deployment link on the main page everything looked fine. I clicked through to The Personal Letterboxd Project post and then realised that the URL had changed from:
https://5d48d575.whyteryan.pages.dev/
to
https://www.conorjwryan.com/posts/the-personal-letterboxd-project/
This defeats the point of having unique deployment urls. Negating all its advantages discussed previously. There is no way to interact with this site in isolation.
Why Does This Happen and How to Fix It
Looking at the code of the deployment URL. This URL change happens because https://www.conorjwryan.com/ is hardcoded in every link on the Hugo site. Looking at the Hugo files this is a result of using Hugo variables like {{ .Permalink }} and {{ .SiteBaseURL }} used in the template. Hugo takes the baseURL value from a site’s config.toml file and if coded with those variables generates hardcoded links to conorjwryan.com regardless of the actual domain you’re on. Such a pain!
I am using the Gokarna theme which uses {{ .SiteBaseURL }} links mostly in the navigation bar. Your theme might be different but this advice is applicable regardless.
I’ve found the solution to be as simple as editing my config.toml file and changing the value of baseURL from https://www.conorjwryan.com:
to ""
Doing this has now meant that Cloudflare Pages works as it should and each unique deployment URL works as intended. Now I can view my site at different points in history or collaborate with teammates on new features.
Notes on baseURL
-
Any deployments made prior to change in baseURL with a hardcoded address (eg: conorjwryan.com) will still redirect to that stated URL. Any links generated after the change will work as intended.
-
Setting your baseURL to
""is also important for working with multiple domains. Click here to find out how to find out how to successfully change your domain name on Cloudflare Pages (Post Upcoming). -
In the Cloudflare Tutorial they advise you to set your baseURL in the build command as
hugo -b $CF_PAGES_URLbut for me this results in the same issue but in reverse. On my main siteconorjwryan.comlinks get redirected to the unique Cloudflare deployment url5d48d575.whyteryan.pages.dev/ -
If you also have
Cloudflare Accessenabled to protect your restrict access to your unique deployment URLs using the above method innote 2will break your website. Click here for how to implementCloudflare Accessproperly on your Cloudflare Pages Site (Post Upcoming)
Conclusion
No software or service completely fits your needs when first setup. It takes time to customise and tailor your experience to your liking. I hope this post has been helpful in shortening that process.
Until next time,
Conor